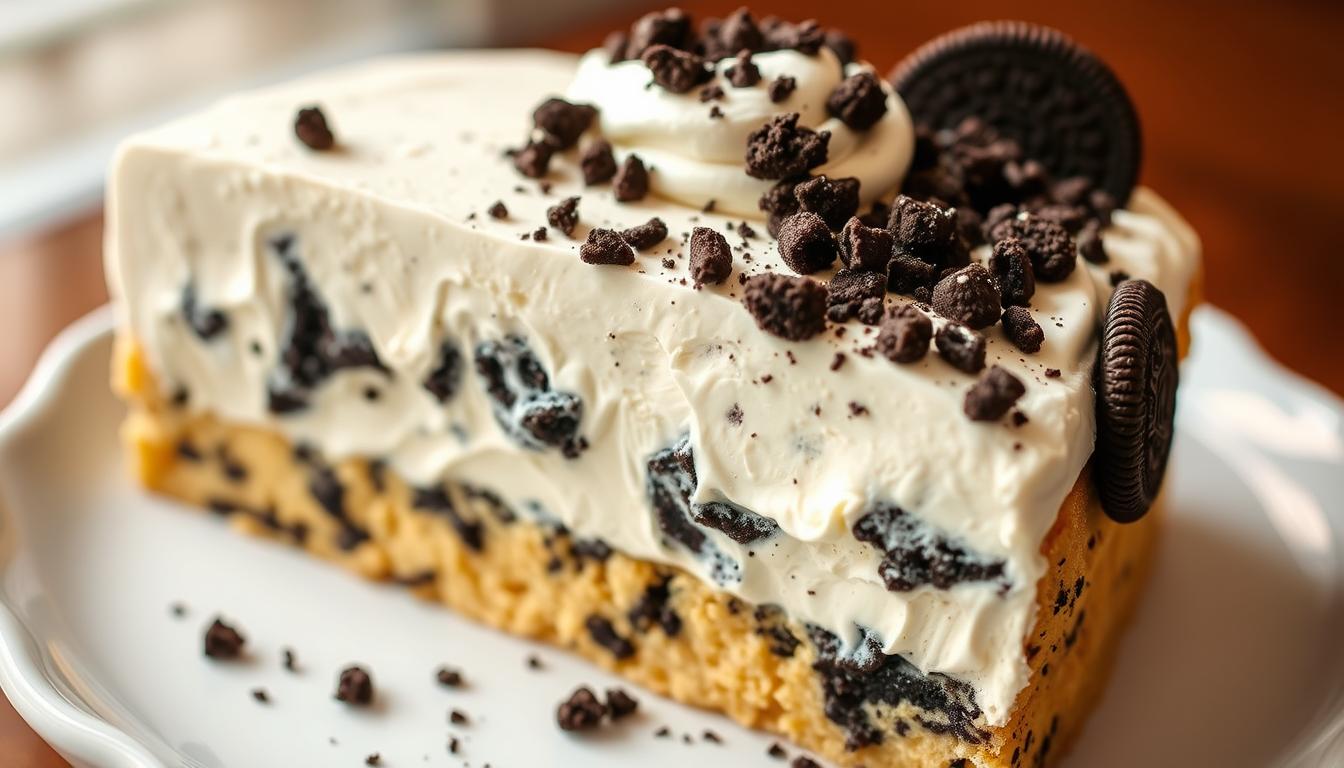
How to Make the Perfect Oreo Ice Cream Cake
Imagine the joy of serving a decadent dessert that’s both easy and irresistible. You’re about to make a show-stopping treat for any occasion.
Looking for a cool dessert for summer? This no-bake delight combines hot fudge, Cool Whip, and crushed cookies. It’s sure to impress everyone. Its simplicity and rich flavors make you the star of any gathering.
Table of Contents
The Allure of Oreo Ice Cream Cakes
Oreo ice cream cakes are loved for their simplicity and the joy they bring. These delicious Oreo ice cream cakes are great for warm weather. They mix the crunch of Oreo cookies with the smooth ice cream.
When thinking about making an Oreo ice cream cake, you might choose between homemade or store-bought. Many prefer making it at home for a better taste.
Why Homemade Beats Store-Bought
Making an easy Oreo ice cream cake at home lets you pick the ingredients and customize it. Homemade cakes can use your favorite ice cream and toppings. This way, you get a treat that’s just right for you. Plus, homemade desserts don’t have the preservatives found in store-bought ones, making them fresher.
| Feature | Homemade | Store-Bought |
|---|---|---|
| Customization | High | Low |
| Preservatives | None | Often Contains |
| Taste | Fresh, Customizable | Standard, May Lack Freshness |
What Makes an Oreo Ice Cream Cake Special
An Oreo ice cream cake is more than a dessert; it’s an experience. The mix of cold ice cream and crunchy Oreo cookies is a joy to eat. Plus, these cakes are perfect for any occasion, from family dinners to formal events. They’re a delicious Oreo ice cream cake that will wow everyone.
Essential Ingredients for Your Oreo Ice Cream Cake Recipe
To make a delicious Oreo ice cream cake, you need a few key ingredients. The quality of these ingredients is important. It will make a big difference in how your cake tastes.
The Oreo Cookie Base
The crust is a key part of your no-bake Oreo ice cream cake. It adds texture and flavor to the creamy ice cream.
Regular vs. Double Stuffed Oreos
You can choose between regular or double-stuffed Oreos for your crust. Double-stuffed Oreos have a creamier taste. Regular Oreos have a stronger cookie flavor.
Quantity Needed for Different Cake Sizes
The number of Oreos you need depends on your cake’s size. For a standard cake, you’ll need about 36 Oreos for the base and topping.
Ice Cream Selection Tips
Picking the right ice cream is crucial for your no-bake Oreo ice cream cake. You can choose vanilla or chocolate ice cream, based on what you like.
Vanilla Ice Cream Options
Vanilla ice cream is a good choice because it lets the Oreo flavor stand out. Look for high-quality vanilla ice cream that’s smooth.
Chocolate Ice Cream Alternatives
If you want a stronger chocolate taste, use chocolate ice cream. It goes well with Oreos and makes your cake richer.
Additional Toppings and Fillings
You can also add toppings and fillings to your cake. Use about 100g of salted butter to help hold your Oreo crust together.
| Ingredient | Quantity | Purpose |
|---|---|---|
| Oreos | 36 | For the crust and topping |
| Salted Butter | 100g | To bind the Oreo crust |
| Ice Cream | As needed | Main filling |

Kitchen Tools You’ll Need
To start making your best Oreo ice cream cake recipe, you’ll need some basic kitchen tools. The right equipment makes the process easier. It also helps your homemade Oreo ice cream cake turn out perfectly.
Essential Equipment
You’ll need a 9-inch springform pan, a mixing bowl, and an electric mixer. A freezer-safe container is also necessary. Don’t forget a measuring cup and spoons for precise measurements. A food processor is key for crushing Oreo cookies for the crust.
Optional Tools That Make the Process Easier
An ice cream scoop makes creating uniform ice cream layers easy. An offset spatula is great for smoothing the cake’s top and sides. A piping bag is handy for decorating with whipped cream.
Preparing the Perfect Oreo Crust
The base of a fantastic Oreo ice cream cake is its crust. A good crust adds texture and boosts the dessert’s flavor. To make it, focus on crushing the Oreos, binding them, and freezing them first.
Crushing Techniques for Optimal Texture
To crush your Oreos, use a food processor or blender. Aim for a fine crumb that sticks well in the pan. As Joe Decker, a famous pastry chef, said, “A great crust needs fine, even texture.”
Binding the Crust Together
After crushing, bind the Oreos with melted butter. Mix until everything is well combined. The butter holds the crust together and adds flavor. “The right butter amount is key,” a chef advises. “Too little, it falls apart; too much, it’s soggy.”
Pre-Freezing for Stability
Press the crust mixture into a 9×13″ pan and freeze it first. This step keeps the crust firm when adding ice cream layers. Freezing for 10-15 minutes is enough, a baking blog suggests. “Pre-freezing is crucial for a stable dessert.”
By following these steps, you’ll make a sturdy, tasty Oreo crust for your ice cream cake.
Creating the Creamy Ice Cream Layers
It’s time to start making the ice cream layers of your delicious Oreo ice cream cake. Here, you mix creamy ice cream with crunchy Oreo cookies. This combo makes a dessert that’s hard to resist.
Softening Ice Cream Properly
To begin, soften your ice cream to a scoopable state. Take it out of the freezer and let it sit at room temperature for 10-15 minutes. It should be soft but not too runny. This step is key for an easy Oreo ice cream cake that looks and tastes great.
Incorporating Oreo Pieces
After softening, mix crushed Oreo cookies into the ice cream. This adds flavor and texture. Just fold the Oreos into the ice cream until they’re spread out evenly. You can save some Oreos for the top, depending on your design.
Layering Techniques for Visual Appeal
Now, layer the ice cream in your pan. For a simple look, stack the ice cream sandwiches in two layers. Smooth out the edges for a flat top. This makes your cake look professional and appealing. You can also add whipped cream or fudge for extra flair.
Adding a Decadent Fudge Layer
Make your Oreo ice cream cake even better with a rich fudge layer. A homemade hot fudge sauce adds depth and makes it irresistible.

Homemade Hot Fudge Recipe
Make your own hot fudge sauce to match your taste. It’s easy and only needs a few ingredients.
Ingredients List
- 1 cup heavy cream
- 1/2 cup granulated sugar
- 1/4 cup unsweetened cocoa powder
- 1/2 teaspoon salt
- 1/2 cup chopped semisweet chocolate
- 2 tablespoons unsalted butter
- 1 teaspoon vanilla extract
Cooking Instructions
To make the hot fudge, mix the heavy cream, sugar, cocoa powder, and salt in a saucepan. Heat it over medium, whisking until boiling. Then, lower the heat and simmer for 5 minutes, stirring often.
Remove from heat and melt the chocolate in. Add the butter and vanilla, stirring until smooth. Let it cool a bit before using.
Proper Application and Setting
To add the hot fudge, pour the cooled sauce over the ice cream. Spread it evenly with an offset spatula or spoon. If using Hershey’s, warm it slightly for easier pouring.
Freeze the cake for 30 minutes to set the fudge. Then, add toppings or serve.
The Best Oreo Ice Cream Cake Recipe: Step-by-Step Assembly
To make the best Oreo ice cream cake, follow this step-by-step guide. Assembling your Oreo ice cream cake is exciting but requires patience. It yields impressive results.
Building the Base Layer
The foundation of your Oreo ice cream cake recipe is the crust. Start by preparing your Oreo crust. It involves crushed Oreos mixed with a binding agent, pressed into a springform pan. Make sure it’s evenly distributed and chilled properly.
Adding Middle Layers
Once your crust is ready, add the ice cream layers. Soften your ice cream to a spreadable consistency. Then, mix in crushed Oreos for an extra cookie kick. Spread this mixture over your crust, smoothing it out.
You may need to repeat this process for a taller cake.
Creating the Perfect Top Layer
The top layer of your Oreo ice cream cake is where you can get creative. Consider a layer of whipped cream topped with additional Oreo cookies or cookie crumbs. This adds visual appeal and flavor.
Smooth out your top layer and decorate it as you like. You can use additional Oreos, chocolate sauce, or other toppings.
By following these steps, you’ll have a beautifully assembled Oreo ice cream cake. Remember, patience and attention to detail are key. Ensure each layer is set properly before adding the next.
Freezing and Setting Your Masterpiece
After you’ve put together your no-bake Oreo ice cream cake, freezing it is key. Freezing makes your cake stable, so it won’t fall apart when you serve it.
Optimal Freezing Time
For the best taste, keep your homemade Oreo ice cream cake in the freezer for at least 4 hours. But, freezing it overnight is even better. It lets the flavors mix well and the cake to set fully.
Preventing Freezer Burn
To avoid freezer burn, wrap your cake well. Use plastic wrap or a lid to keep cold air out. Here are some tips to remember:
- Wrap the cake tightly with plastic wrap.
- Cover it with a lid or aluminum foil for extra protection.
- Store it in the coldest part of the freezer.

By following these steps, you’ll enjoy your no-bake Oreo ice cream cake perfectly. It will have a smooth texture and rich flavor.
Troubleshooting Common Oreo Ice Cream Cake Problems
Even with careful planning, your Oreo ice cream cake might face some issues. But, these problems can be fixed with the right steps.
Dealing with Melting Issues
When your cake starts to melt, it’s often because of the wrong freezer temperature or changes in temperature. Make sure your freezer is at the right temperature. You can even use a thermometer to check. Also, try to keep the cake in the freezer as much as possible.
- Keep the cake frozen until serving.
- Avoid leaving the cake at room temperature for extended periods.
- Use a chilled serving plate to keep the cake cool.
Fixing Crumbly Crusts
A crumbly crust can be a letdown. But, it’s simple to fix. The trick is in how you prepare it: use the right mix of crushed Oreos and binding ingredients. Press the mix firmly into the pan. If it’s still crumbly, a bit of melted butter or cream can help stick it together.
Resolving Uneven Layers
Uneven layers can ruin the look of your cake. To get smooth layers, level each one as you stack them. Use a flat surface and be gentle. If needed, a bit of ice cream can help stick the layers together.
Tips for achieving even layers:
- Use a consistent amount of ice cream for each layer.
- Chill the cake briefly between adding layers to help it set.
- Use a sharp knife to level the cake, if necessary.
Decorating Your Oreo Ice Cream Cake
Now that your Oreo ice cream cake is ready, it’s time to decorate it. Decorating lets you show off your style and make your dessert special.
Whipped Cream Techniques
You can make your Oreo ice cream cake look amazing with whipped cream. Use 8 ounces of cool whip or homemade whipped cream, slightly softened. This way, you can get smooth or textured finishes.
Homemade vs. Store-Bought Options
Store-bought whipped cream is easy to find, but homemade gives you more control. You can adjust the sweetness and texture to your liking.
Piping Methods for Beginners
If you’re new to piping, start with simple designs. Remember, practice makes perfect. Don’t worry if your first tries aren’t perfect.
Oreo Cookie Decorations
Oreo cookies are great for decorating your cake. You can sprinkle crushed Oreos around the edges or arrange whole cookies on top in a pattern.
Creative Topping Ideas
Think about adding toppings to your Oreo ice cream cake. Chocolate shavings, sprinkles, or caramel or hot fudge sauce can make it look and taste better.
Storage and Make-Ahead Tips for No-Bake Oreo Ice Cream Cake
To enjoy your homemade Oreo ice cream cake at its best, follow these storage and make-ahead tips. The key to maintaining its freshness and texture lies in proper handling and storage.
Proper Wrapping Techniques
To prevent freezer burn and keep your no-bake Oreo ice cream cake fresh, it’s essential to wrap it correctly. Use plastic wrap or aluminum foil to cover the cake tightly, ensuring there are no exposed areas. For added protection, you can also place the wrapped cake in a freezer-safe bag or container.
Maximum Storage Time
Your homemade Oreo ice cream cake can be stored in the freezer for up to 2 weeks. For the best flavor and texture, it’s recommended to consume it within a week. All the ingredients freeze beautifully, so feel free to prepare the cake as directed, freeze, and then pull it out when you’re ready to serve.
Thawing Instructions Before Serving
When you’re ready to serve your no-bake Oreo ice cream cake, remove it from the freezer and let it thaw in the refrigerator for about 30 minutes to an hour. This will help the cake soften slightly, making it easier to slice and serve. You can also let it sit at room temperature for a few minutes to achieve the perfect consistency.
Conclusion: Enjoying Your Homemade Oreo Ice Cream Cake Creation
Now that you’ve made your oreo ice cream cake recipe, it’s time to enjoy it. Your homemade cake is great for any celebration or just when you want something sweet.
When you take a bite, the crunchy Oreo crust, creamy ice cream, and rich fudge sauce will amaze you. You can add your favorite toppings to make it even more special.
With the homemade oreo ice cream cake recipe, you can try new flavors and ingredients. Keep leftovers in the fridge to enjoy your cake for days.